
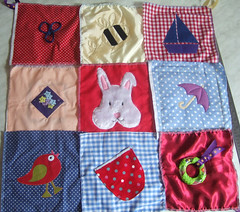
For this you’ll need:
Nine squares from the other parts
Backing fabric 24” by 24”
Square of wadding (just a bit smaller than the backing fabric)
Bias binding (approx 2.5 metres)
Small scissors
Fabric scissors
Thread
Pins
First trim any loose threads from each square.
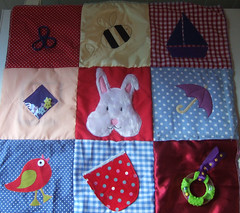
Next you need to decide definitively what order your squares are going in, lay them out and have a play…
 |
 |
 |
 |
Sew the three squares together and repeat with each row.
Next you need to sew the three rows to each other to make a big square. Put the bottom row and the middle row wrong sides together and pin along the lines. Do the same with the top row and the middle row and sew together on the machine. Then you should have the top part of your play mat.
 |
 |
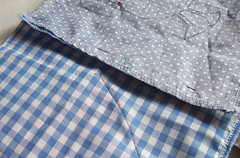
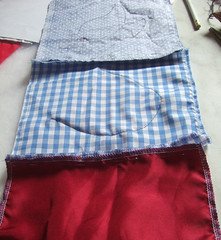
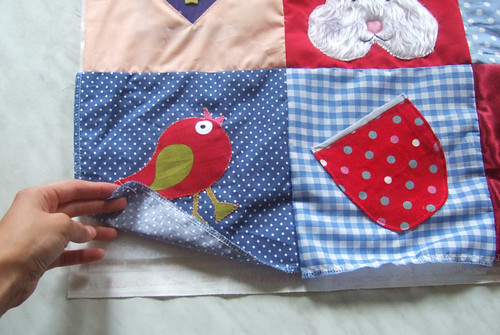
So now you can layer this up with the wadding. Put the backing fabric, right side down, place the wadding on top of this, then the top part of the playmat on top of this, right side facing up.
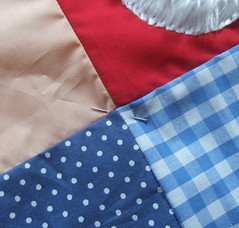
Next because we’re going to do a bit of quilting, you need to pin the layers together really well. Start off from the centre, putting pins around the centre square at the corners. Then working outwards place pins across the meeting lines of each of the squares. Make sure the fabric is as taut as possible.
 |
 |
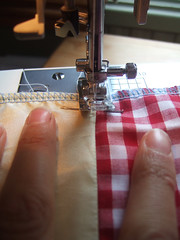
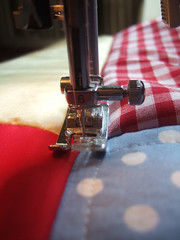
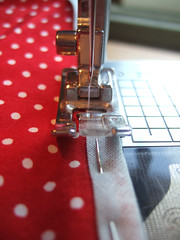
Next take to the machine to sew in the ditches of the stitch lines created by sewing the front part together – your basically sewing four long lines – like a noughts and crosses grid, like so:
 |
 |
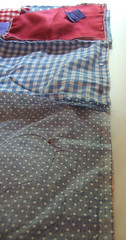
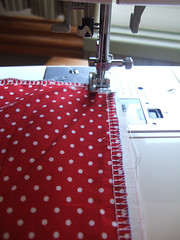
Next you’ll want to neat up those outside edges – pin them together, again making sure the fabric is quite taut. Then sew around the edges, about ½” in from the edge. Trim the edges, as shown below:
 |
 |
Next it’s time to put the bias binding on. Now I didn’t put this on the proper way, mainly because I was running out of time, but also I thought it would probably be more secure, as often when you put bias binding on an item you can fail to catch the back of it with the stitching and you have to go back and do it again.
Anyway to see how to put the binding on with no viable stitching see ‘the pocket square’
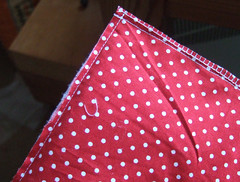
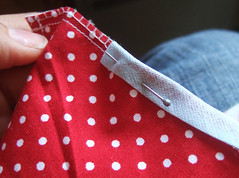
But this is how I did it. Cut the end of your binding into a point and fold over. Crease your binding in half (length ways) and fold over the edge of your mat, pin into place all the way around the edge. When you get to where the ends meet, tuck one end under the folded end that you started with.
Next take to the machine and sew on, I did two stitch lines to make sure it was on really securely.
 |
 |
 |
Trim any loose threads, making sure all the stitching is secure.
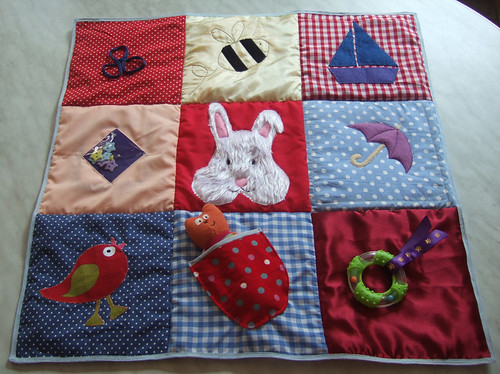
And there you have it, your baby’s playmat!
Back to part ten
No comments:
Post a Comment