This is one of the easiest squares to make. Using felt gives yet another texture, and you could use different felt shapes to create any number of pictures.
For this square you will need:
A fabric square prepared in part one.
Two or three piece of coloured felt
Thread, scissors
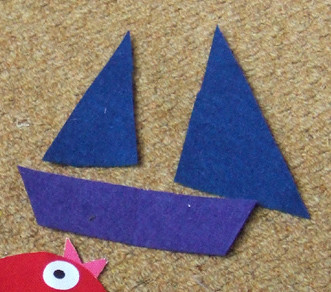
First cut yourself two tall triangles from the felt, one slightly bigger than the other for the sails. Then from another colour a trapezium shape for the boat part:
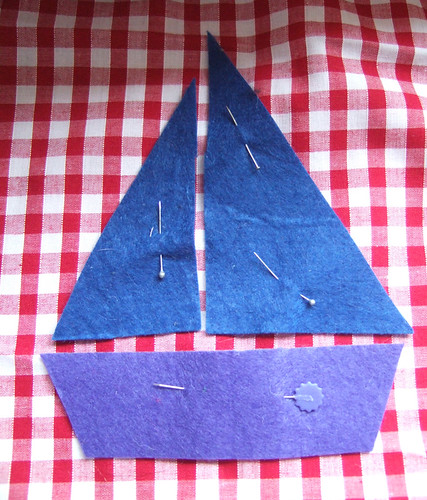
Place the pieces on the square, the triangles next to each other, above the trapezium shape (see below) and pin into place.
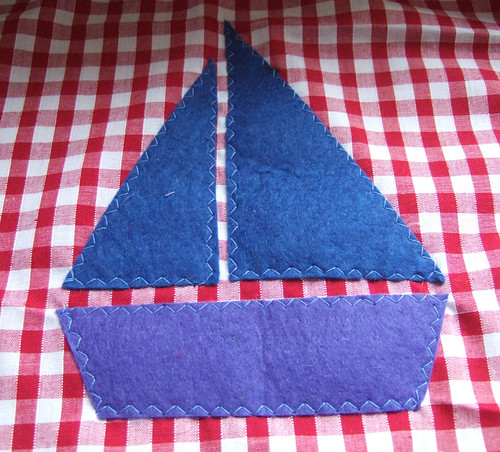
Using Zig-zag stitch, sew round the edges of each shape, pulling the threads through to the back and tying them off after.
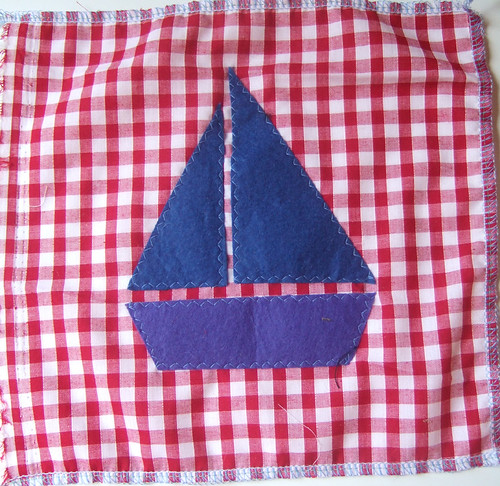
And there you have it, the extremely simple boat square. You could add a squeaker under the square to add interest or maybe a ribbon flag.
Next time I'll be going through the rattle square.
Back to part five
On to part seven
Friday, 26 August 2011
Thursday, 25 August 2011
Make do and mend
I’ve always loved 1940's fashion, actually I think there’s something about that whole era, during and post war, people over-coming adversity and being brought together in a way we probably haven’t experienced since. The war and post war years had a significant effect on fashion; the Paris fashion houses had little influence during the war although that soon returned after it was over. Rationing existed until 1952, and that included clothes and fabric, so women had to rely on clothes they already had, mending them or changing them, their rations and, for some, their uniforms. Limited resources meant full skirts were not an option. Even so the silhouette of the 1940s is feminine and graceful, even those strong shoulder lines don’t seem to sharp when teemed with that cinched in waist and figure hugging skirts.
I’ve been dabbling in making vintage inspired clothing for a while now, with my kitchen wear, and 1950’s skirts, but now I’d like to take that further. I’m starting to produce a fuller range of vintage inspired clothing (I say vintage inspired as I to me something is only truly vintage if it actually comes from that period).
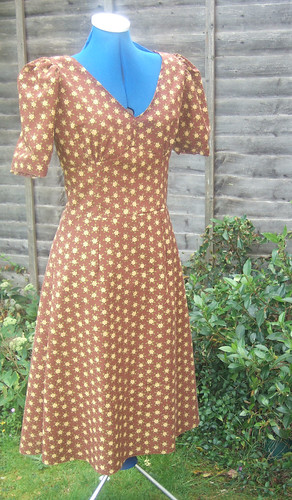
I’m starting with a 1940's day dress design, it’s not quite done yet, but I thought I’d share my progress….
In the true spirit of make do and mend, the fabic is actually from some sheets I spotted at a car boot sale.
It still needs fastenings put in at the back, hemming and cuffs on the short sleeves, and possibly some button detail, but I’m still thinking on that.
Next up I have some cherry printed fabric that’s just crying out to be made into a classic 1950s day dress, I’ve already made the pattern, so hopefully that’ll be featuring on here soon too.
To find out more about 1940s clothing and rationing, I found this site to be very interesting, she even includes the original text for rationing books.
Wednesday, 24 August 2011
Making a Playmat, a step by step guide, part five: The Pocket Square
I love pockets on anything, so I had to include one on the playmat, plus I thought something could then go in this pocket, although I didn’t work out what until later. I used a soft velvety cord fabric for the pocket, adding another texture to the mat.
For this square you will need:
A fabric square prepared in part one.
A contrasting fabric for the pocket
Some bias binding
Thread matching the pocket fabric
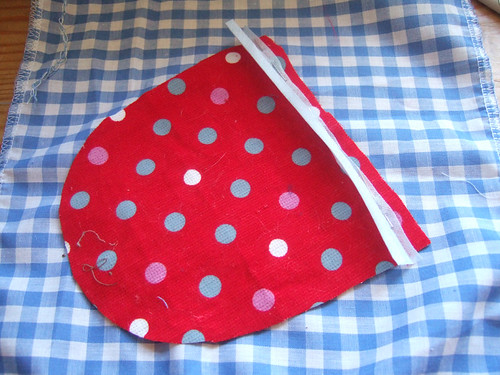
First cut out your pocket shape, I chose to have mine curved at the bottom, with a straight top, but you could have square one or completely circular, whatever you want.
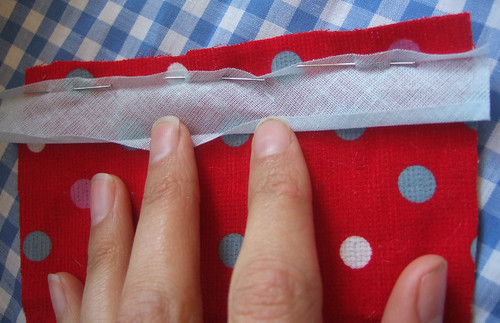
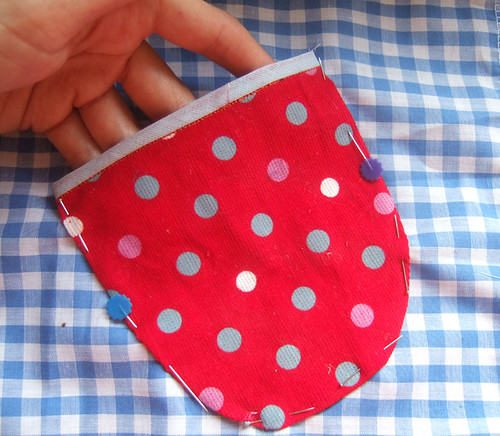
Next take your strip of bias binding and open one of the folded edges out. Pin the binding along the top of your pocket along the fold line of the bias binding, pictured below.
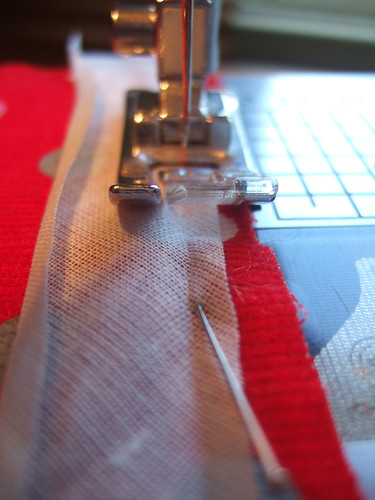
Then sew along this line.
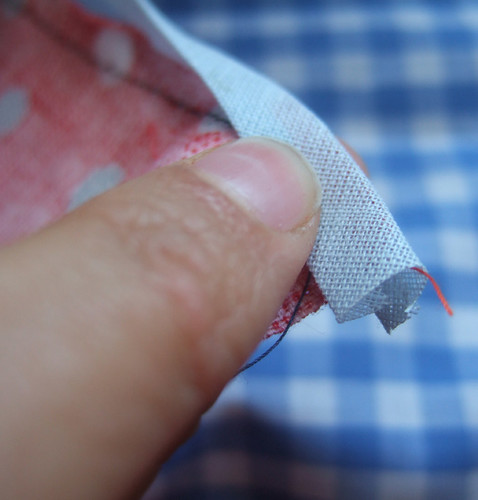
Next fold the binding over, not quite in half, there should be slightly more on the wrong side of the pocket, pictured below, it might be necessary to trim the top of the pocket fabric a little if not enough of the binding will fold over.
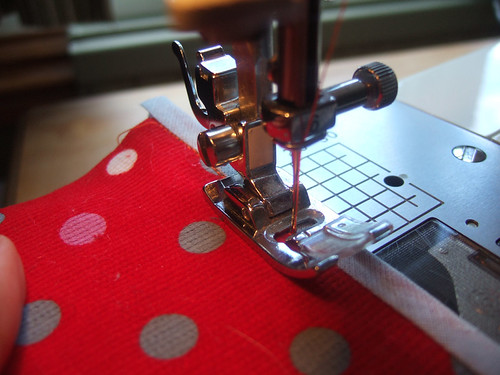
Pin this in place on the right side of the pocket. Then ‘ditch’ stitch along the edge of the binding i.e. sew in the ditch created by sewing the first part of the binding on, or as close as possible. Use a thread that matches the fabric of the pocket.
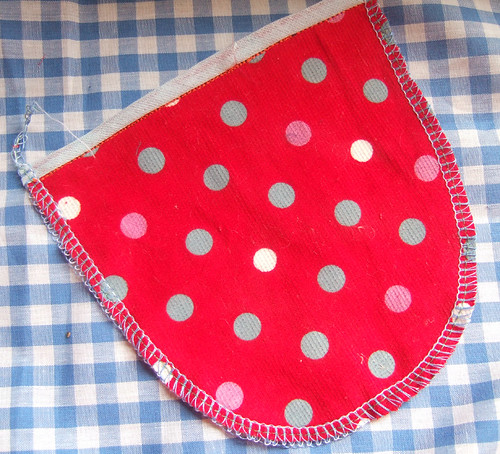
When you’ve finished, turn the pocket over to make sure you’ve caught the back side of the binding in the stitching. If you haven’t you’ll need to redo it, perhaps folding the binding further over.
Next overlock/serge or zig zag the edge of the pocket.
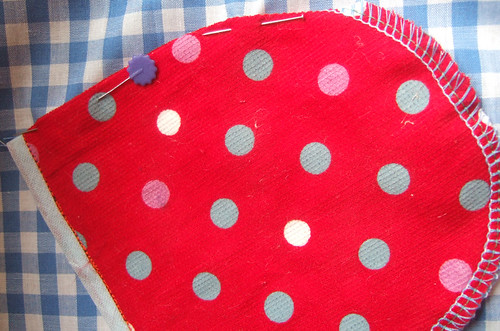
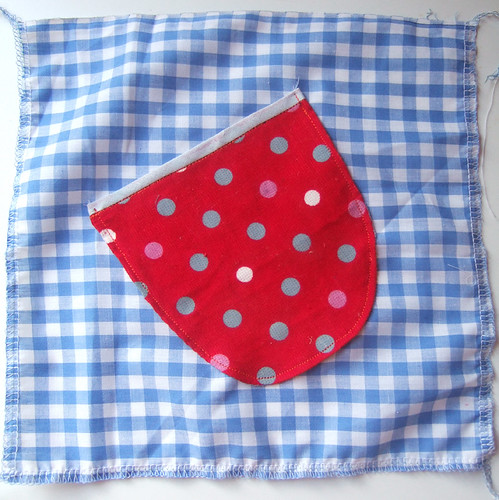
Then place the pocket onto the fabric square. I put mine on at an angle, but you can put it on straight or anyway you like. Fold over the overlocked/serged edge and pin to the backing fabric:
Carry on pinning all the way around, taking care not to pin it on too flat/tight, so you can get some fingers in – important if the pocket is to be useable.
Then sew on the pocket, using straight stitch.
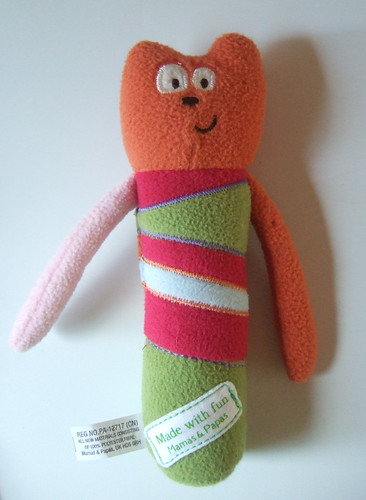
I didn’t find anything to go in the pocket until after I sewn the playmat together, eventually I stumbled across this cute squeaky toy in ‘Mamas and Papas’.
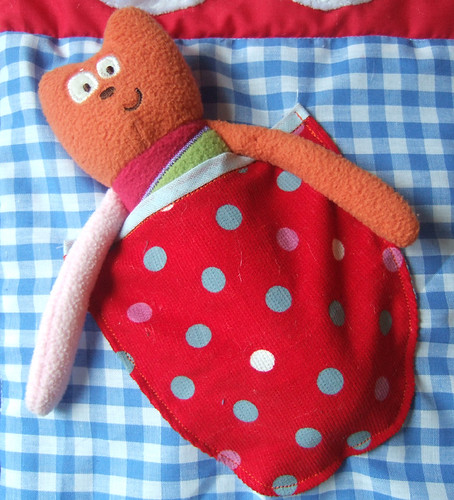
And here he is in place.
So that’s the pocket square! In step six I’ll be going through the ‘Boat’ square.
Back to part four.
On to part six.
Tuesday, 23 August 2011
Making a Playmat, a step by step guide, part four: The Bee Square
For this square I used a pale yellow lining fabric, this brings a different texture to the mat, as it’s smooth. Adding to that, the strips of the soft loop side velcro give it another dimention.
For this square you’ll need:
One of the fabric squares prepared in part one (a lighter one is better to show up the black stitching.)
Two short strips of the loop/soft side of sew-on velcro (about 2” long)
Black thread
Square of felt in similar colour to the fabric (optional depending on the thickness of the top fabric, mine was thin and I didn’t want it to pull as I sewed it)
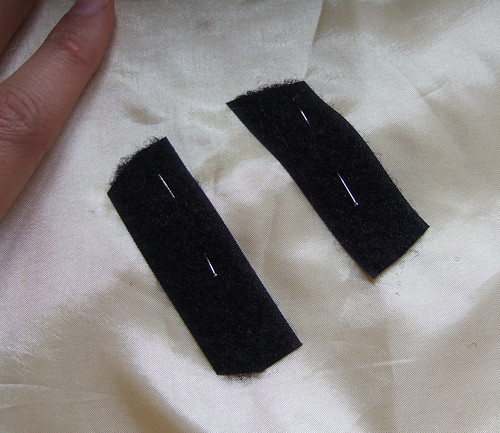
I started by placing some yellow felt under my fabric (to stop the machine from pulling the thin fabric), then positioning my two strips of velcro about ¾ of an inch apart in the centre of the square and pinning them, catching the felt in the pins as well.
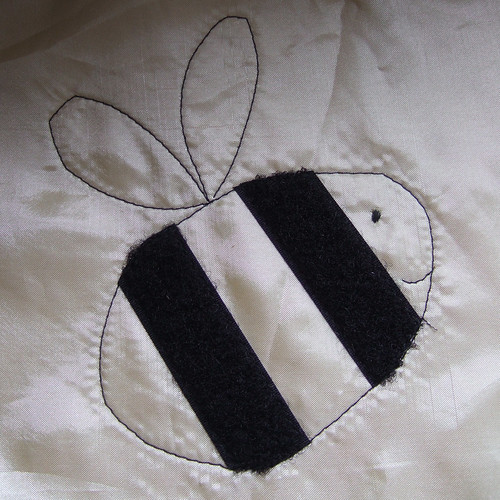
I put them at a slight angle, so eventually it would look like he bee was flying upwards. You can see from the photo that I curved the corners of the velcro to fit the shape of the bee.
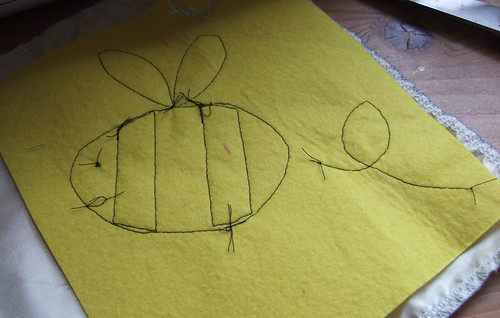
Next sew on the velcro using black thread and pull the threads through to the back after, knotting them together.
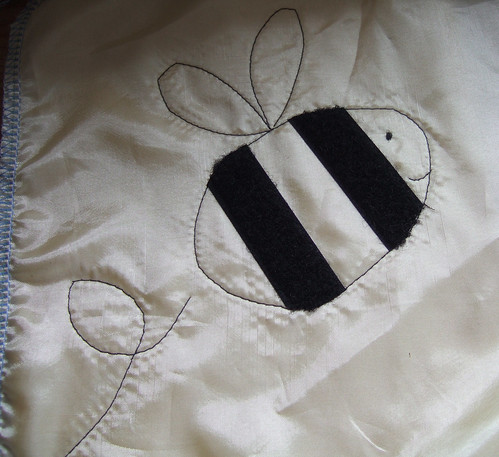
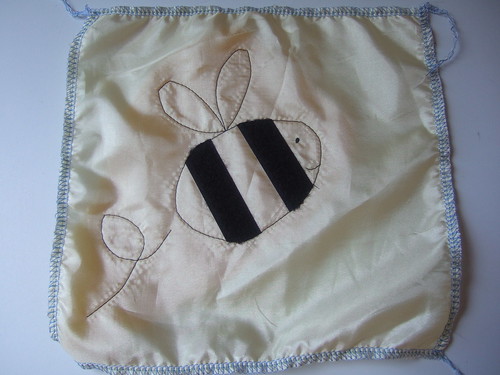
Next with straight stitch sew an egg/oval shape around the two velcro stripes, making sure the stitch line touches the tops and bottom edges of the velcro. The smaller end of the egg shape should be where you intend the face to be. Then stitch on the smile at the smaller end, and two petal shapes for the wings on the top – see picture below
Once again I used back embroidery thread to create the bee’s eye.
Next you can add a fly line, you’ll need to keep your machine going quite slow to keep any loop-the-loops tight.
Tie off all the threads at the back.
And there you have it, your third square – a cute bee with a combination of textures to stimulate your baby's senses!
In part five I’ll take you through the ‘pocket’ square.
Back to parts one & two can be found here.
Back to part three.
On to part five
Monday, 22 August 2011
Making a playmat, a step by step guide, part three: The Crinkle Square
The crinkle square.
On most playmats, there’s that square that makes a rustling noise when you touch it.
For this square, you’ll need:
One of your 9” by 9” fabric squares, cut out in part one
An 8” by 8” square of felt
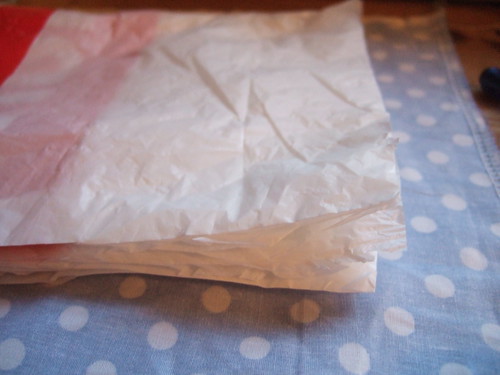
One or two plastic bags, folded up
Thread
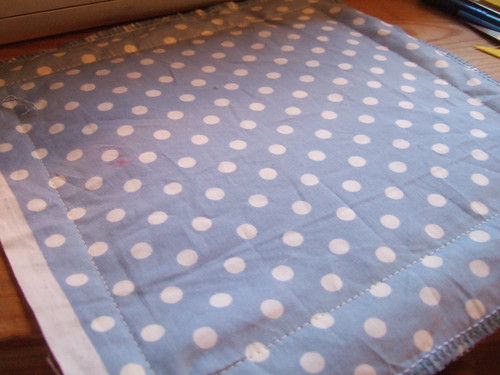
Start by taking your wadge of plastic bags, holding the layers together, cut out a rough square, approximately 7.5” squared. It doesn’t need to be that accurate, so long as it’s smaller than your square of felt. Lie the layred plastic squares in the centre of your fabric square.
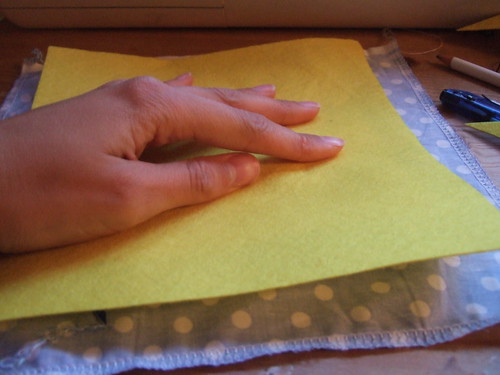
Place your piece of felt on top of the plastic, sandwiching it between the felt and the fabric and pin into place.
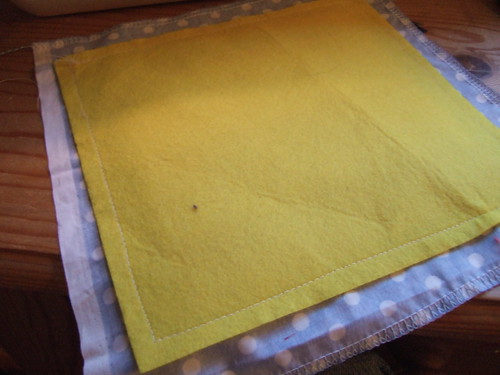
Using a straight stitch, sew the felt to the fabric. I avoided catching the plastic with my machine, as I feared it might blunt it.
Pull the threads through to the back and fasten securely.
I did wonder after if I should have screwed the plastic bags up rather than folded them, to get more noise out of them, but I figured that might not be as comfortable for the baby to lie on, so I stuck with how I did it.
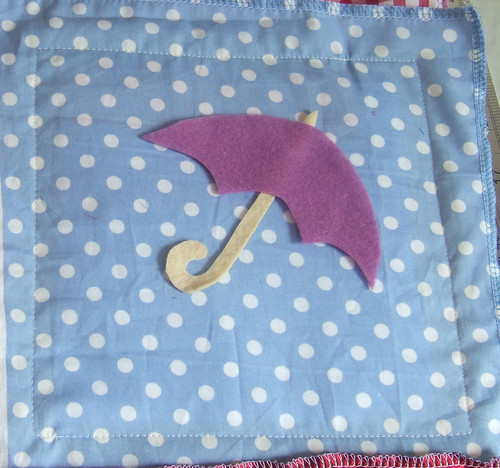
When the top part of the mat was done, I thought this square looked a little plain compared to the rest, so I decided to add a little felt umbrella:
First I cut out two simple shapes out of felt.
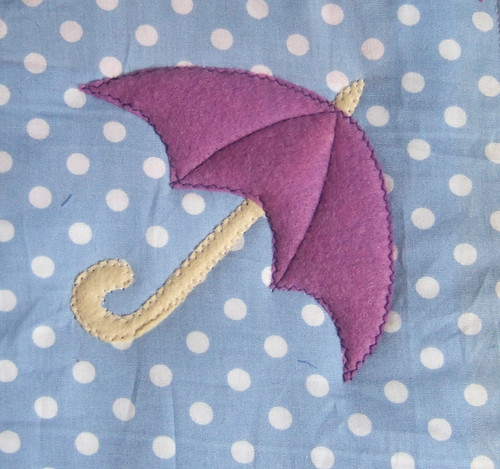
Then I used zig-zag stitch to sew on the handle. I placed the brolly part over the sewn-on handle and zig-zagged around that. I used straight stitch to mark out the umbrella sections.
And there you have it, the crinkle square! In part four I’ll take you through how I did the Bumble Bee square.
Making a playmat, a step by step guide: Parts one and two
Play-mat Part One: Getting Started
One of my best friends is about to have a baby boy, I think I mentioned that in my last post, but it's been a while since that post... anyway I wanted to make her something for him. I was a bit worried about whatever I made being 'baby safe', so I talked to her first and as it turned out, she's making a lot of things for him too and would prefer to have home made things for him. So after some thought I settled on a playmat.... I figured I could make this pretty safe.
I thought I'd give a step by step guide on how I made this. This post will include parts one and two to start you off. I shall post part three later today.
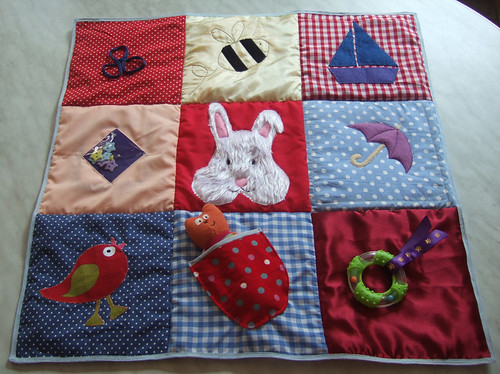
So to start with you’re going to need a few things to make your play mat. The most basic of these is the fabrics, you’ll need nine 9 inch by 9 inch fabric squares to make up your mat, with mine I tried to choose various patterns and textures, but tried to keep it so the colours work together– although that is not essential.
Bright colours and textures stimulate babies, so it’s good to keep this in mind. Saying that this is something you can make using scraps from your fabric stash, which is what I did and unless you want to, you don’t have to go out and buy anything fancy for it, unless of course you want to!
You’ll also need a large piece of fabric for the backing material 24” by 24” and a piece of wadding just a little smaller than this.
Here’s a list of other things that I used:
Sisscors
Thread
Ruler
Pencil
8 by 8 square piece of paper (as a template for the squares)
Pins
Needle
Coloured felt
Fake fur
Other bits of fabric
Cord
Buttons and beads
Bias binding
A plastic bag
Small piece of clear pvc
The soft side of some sew-on velcro
Toy squeaker
Teething ring
Small soft toy
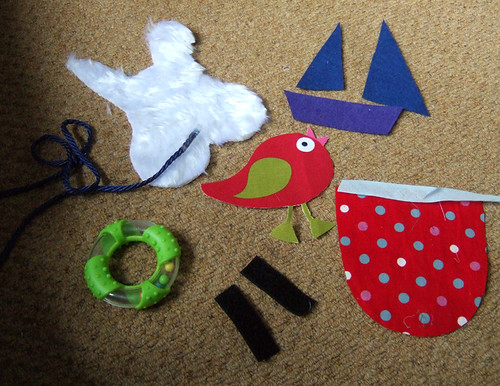
Some of my bits, cut out and ready to use:
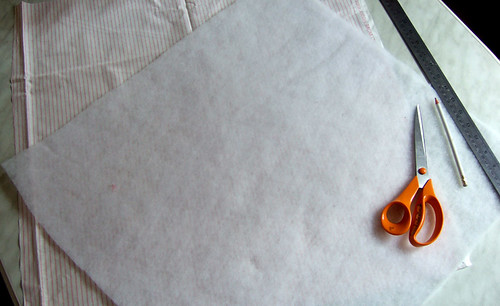
Backing fabric and wadding, My backing fabric is fairly hard wearing thick cotton.
Depending on what you do with each of your squares you might use other bits and pieces.
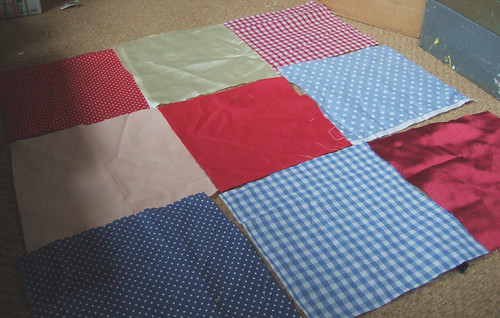
Once you’ve chosen your nine fabrics for the squares cut a 9" by 9" square out of each. I drew around an 8 by 8 inch paper square to give me the seam line and then added half an inch seam allowance all the way around.
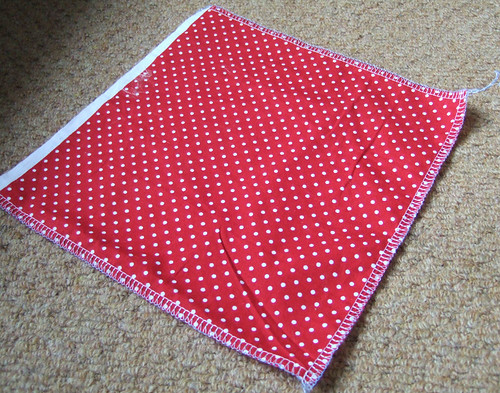
Once cut out, over-lock/serge or zig-zag stitch all of the edges of each square, and the backing fabric.
Then decide what order your squares are going to go in, this might change, as it did in my case, but I found it good to have a rough idea. I knew I wanted to put a furry bunny in the middle of mine as my friends are bunny people and I knew it would probably be the most striking of the squares, I also wanted a plain colour for the background, so I went with red.
I’m going to take you through each of my squares one by one in detail, but obviously you can come up with your own squares : )
Play Mat Part Two: The bunny square.
I picked the plain bright red fabric for my centre square, I thought the white bunny would stand out well on it. Next I drew myself a bunny face template.
Using your template cut the shape out of the fur fabric.
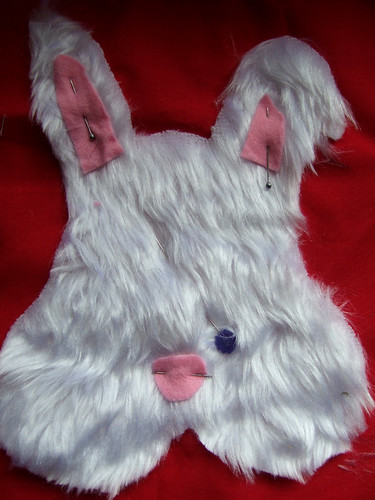
Next, pin the bunny head to the fabric square, making sure it doesn’t over lap the seam allowance. Below the fur bunny and the felt ears and nose are pinned on.
Using a fairly tight zig-zag stitch sew all the way around the outside of the bunny head.
Pull the top threads through to the wrong side of the fabric, by tugging on the under threads, and tie the threads together, this means the stitching is less likely to come undone.
So as not to keep repeating myself, although I'm sure it will happen, I did this with every item I sewed on.
Next cut out a nose shape, and the inside of the ears, in pink felt and sew them on in the same way as the head was.
For the eyes I used black embroidery thread, using several long stitches close to each other. Embroidery thread takes less time to fill up the eye sized space, and I like the satin finish, but you could use normal thread and just go over the stitching a few more times.
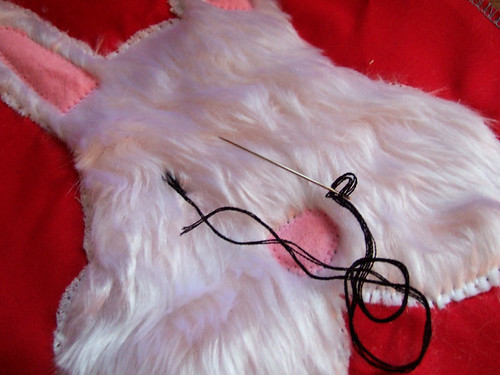
Then trim the fur around the eyes and nose if it’s trying to cover them.
If you like, you could put a toy squeaker under the rabbit head – this should be done when you’re pinning the fur on. (The process of making this was quite organic and it only occured to me part way through to use squeakers, which you'll see later when it came to making the 'bird' square).
The finished Bunny square:
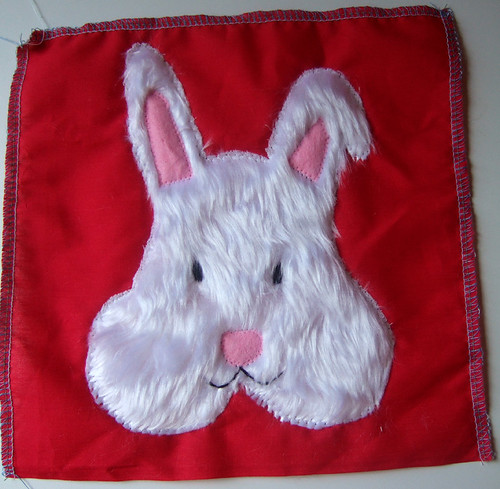
So that’s one square down! Next up in part three - the ‘crinkle’ square
One of my best friends is about to have a baby boy, I think I mentioned that in my last post, but it's been a while since that post... anyway I wanted to make her something for him. I was a bit worried about whatever I made being 'baby safe', so I talked to her first and as it turned out, she's making a lot of things for him too and would prefer to have home made things for him. So after some thought I settled on a playmat.... I figured I could make this pretty safe.
I thought I'd give a step by step guide on how I made this. This post will include parts one and two to start you off. I shall post part three later today.
So to start with you’re going to need a few things to make your play mat. The most basic of these is the fabrics, you’ll need nine 9 inch by 9 inch fabric squares to make up your mat, with mine I tried to choose various patterns and textures, but tried to keep it so the colours work together– although that is not essential.
Bright colours and textures stimulate babies, so it’s good to keep this in mind. Saying that this is something you can make using scraps from your fabric stash, which is what I did and unless you want to, you don’t have to go out and buy anything fancy for it, unless of course you want to!
You’ll also need a large piece of fabric for the backing material 24” by 24” and a piece of wadding just a little smaller than this.
Here’s a list of other things that I used:
Sisscors
Thread
Ruler
Pencil
8 by 8 square piece of paper (as a template for the squares)
Pins
Needle
Coloured felt
Fake fur
Other bits of fabric
Cord
Buttons and beads
Bias binding
A plastic bag
Small piece of clear pvc
The soft side of some sew-on velcro
Toy squeaker
Teething ring
Small soft toy
Some of my bits, cut out and ready to use:
Backing fabric and wadding, My backing fabric is fairly hard wearing thick cotton.
Depending on what you do with each of your squares you might use other bits and pieces.
Once you’ve chosen your nine fabrics for the squares cut a 9" by 9" square out of each. I drew around an 8 by 8 inch paper square to give me the seam line and then added half an inch seam allowance all the way around.
Once cut out, over-lock/serge or zig-zag stitch all of the edges of each square, and the backing fabric.
Then decide what order your squares are going to go in, this might change, as it did in my case, but I found it good to have a rough idea. I knew I wanted to put a furry bunny in the middle of mine as my friends are bunny people and I knew it would probably be the most striking of the squares, I also wanted a plain colour for the background, so I went with red.
I’m going to take you through each of my squares one by one in detail, but obviously you can come up with your own squares : )
Play Mat Part Two: The bunny square.
I picked the plain bright red fabric for my centre square, I thought the white bunny would stand out well on it. Next I drew myself a bunny face template.
Using your template cut the shape out of the fur fabric.
Next, pin the bunny head to the fabric square, making sure it doesn’t over lap the seam allowance. Below the fur bunny and the felt ears and nose are pinned on.
Using a fairly tight zig-zag stitch sew all the way around the outside of the bunny head.
Pull the top threads through to the wrong side of the fabric, by tugging on the under threads, and tie the threads together, this means the stitching is less likely to come undone.
So as not to keep repeating myself, although I'm sure it will happen, I did this with every item I sewed on.
Next cut out a nose shape, and the inside of the ears, in pink felt and sew them on in the same way as the head was.
For the eyes I used black embroidery thread, using several long stitches close to each other. Embroidery thread takes less time to fill up the eye sized space, and I like the satin finish, but you could use normal thread and just go over the stitching a few more times.

Then trim the fur around the eyes and nose if it’s trying to cover them.
If you like, you could put a toy squeaker under the rabbit head – this should be done when you’re pinning the fur on. (The process of making this was quite organic and it only occured to me part way through to use squeakers, which you'll see later when it came to making the 'bird' square).
The finished Bunny square:

So that’s one square down! Next up in part three - the ‘crinkle’ square
Subscribe to:
Posts (Atom)

