
For this square you will need:
A square of fabric prepared in part one.
A pencil and ruler
A selection of buttons and beads
A 3” by 3” square of clear pvc
A 3” by 3” square of coloured felt
Thread
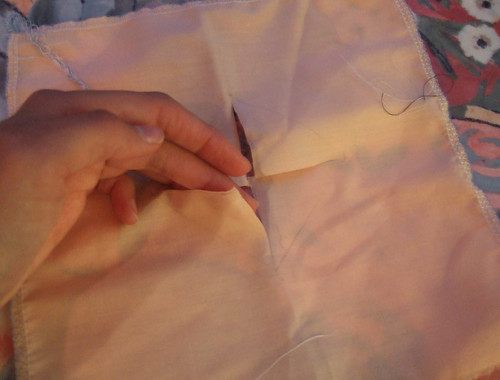
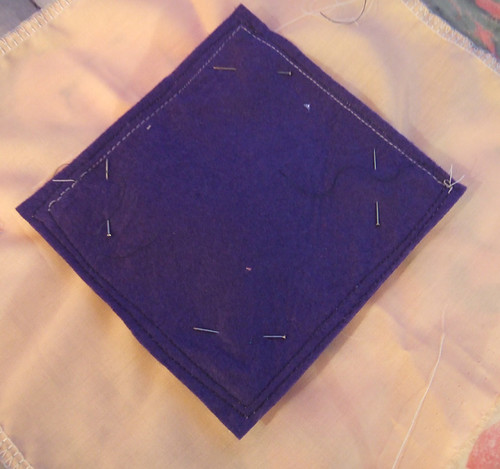
To start off find the centre of your 9 by 9 square, you could do this by folding it in half diagonally one way, then the other, where the crease lines cross should be the centre.
Draw through these diagonal lines lightly with a pencil, about 1 and 3/4 “ either side of the centre point, so that the crossed lines are 3.5” in length in total. Join the lines up to give yourself a 2.5” square.
Make an incision with small/embroidery scissors at the centre point and cut along the diagonal lines. So you’re left with four triangular flaps. See below:
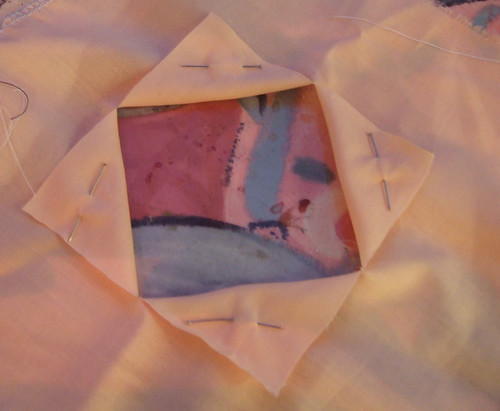
Fold these back to the lines of the square and temporarily pin into place.
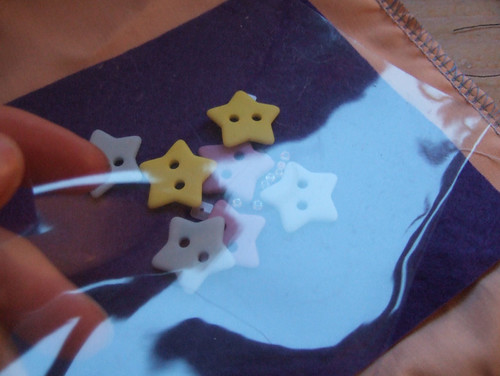
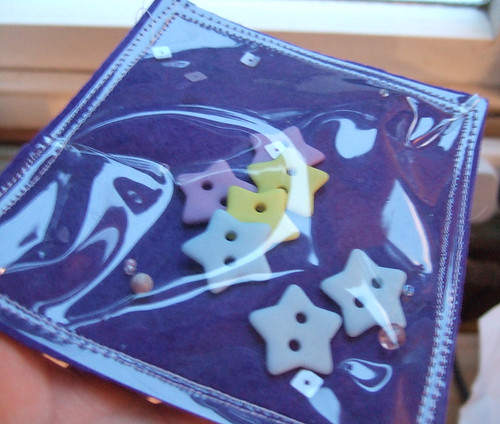
Next take your piece of felt and put your buttons and beads as much in the centre of this as possible. Then lay your clear pvc on top.
Pin the pvc to the felt. This can be tricky with the bulkiness from the buttons, but persevere, the pvc will end up with a couple of creases in it at the corners when you sew it together, and will edge in a little from the felt as it has to stretch over the contents. This doesn't matter.
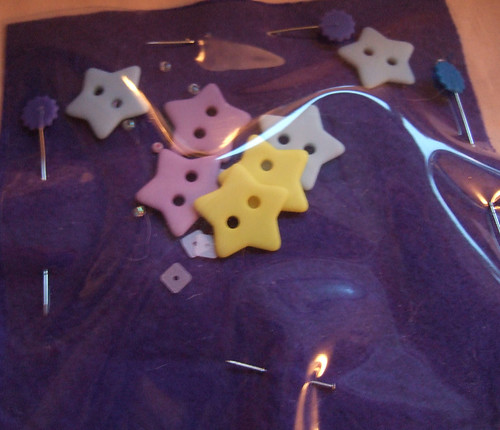
Sew together being careful to avoid the buttons and beads with the needle, I felt it was important to sew this together twice, as you’ll see below. Two rows of stitching are less likely to come undone, I didn’t want any accidents with little bits escaping and making their way into the baby’s mouth.
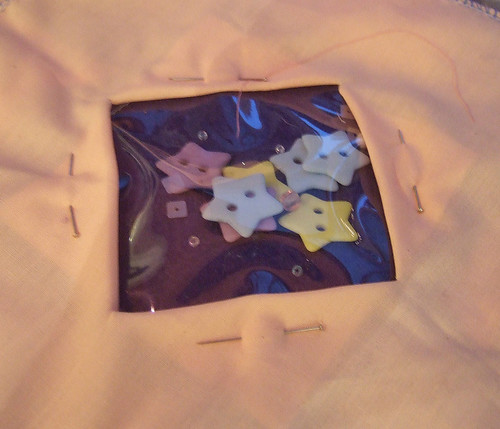
Lay the rattle piece face down in the fabric square, so that it will poke through the square hole. Pin the square in place over the flaps, you can ease out the pins that are already there holding the flaps back and use them to pin the felt down.
Flip over the square to the right side. Then re adjust the pinning so it’s on the front side, you can also fiddle with the square, if any of the flaps aren’t held back tight enough, or the stitching from the felt/pvc square is showing. Make sure you’re happy with how this looks before taking it to the machine.
Using zig zag stitch sew around the edges of your square, pulling through the threads to the back when you’re finished and tying them off. As you sew you can carefully push the buttons etc out of the way of the needle, readjusting where they are each time you sew a new side.
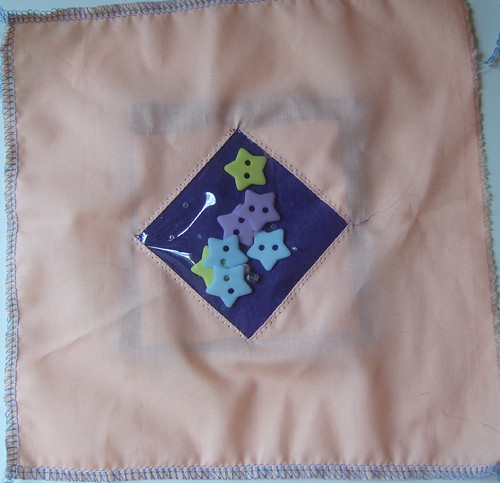
And there you have it – the rattle square. Next time it’ll be the ‘flower’ square.
Back to part six
On to part eight
No comments:
Post a Comment